


")

Lyrical introduction
In this article we will upgrade pocket the lantern on the notorious example of the device Philips. So, what he may have shortcomings? Like all flashlights, this device was observed a significant decrease in the brightness of the lamp filament at "implantation" batteries. And of course, low efficiency and lifetime service. But, nevertheless, the solution to these age-old problems exist.
The LEDs! But will it be sufficient to replace only the source light? No. In most lights used now classical scheme, in which two 1.5 volt batteries connected in series. But the voltage in 3 volts is not enough for the bright glow of led, therefore, is a worthwhile inclusion in the scheme of the Converter. The Converter has a more stable current output, when the input may be 0.5 or less. What is happening with the lamp light, if its battery is discharged to such a limit? Correct, it does not work. Therefore, the Converter is the most good way to solve this problems.
We face a new problem: where to place it? Indeed, in the case lantern is often no place. If you have caseless components can to mark directly in the lamp cap, and if not? This will help to understand my article.
On this lyrics can be considered over. We turn now to the circuitry.
Circuitry
As I said, there is a solution. Quite original the solution, I believe.
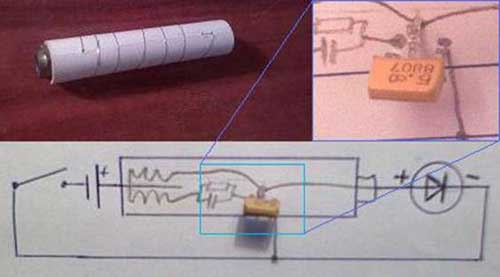
Consider the scheme of the Converter:
The diagram shows the blocking oscillator. Excitation is achieved by transformer coupling transformer T1. The voltage pulses emerging on the right (the scheme), the winding is formed with the voltage source power and led VD1. Of course, you can it would eliminate the capacitor and the resistor in the base circuit of the transistor, but then possible failure of VT1 VD1 and with genuine batteries with low internal resistance. The resistor sets the mode of operation of the transistor, and a capacitor RF skips component.
In the scheme used the transistor KT315 (as cheapest), ultra-bright led (brightest). About the transformer will talk separately. To craft it you will need a ferrite ring (approximate size HH and a permeability of about 1000 HH). Wire diameter of about 0.2 mm On the ring are wound with two coils 20 coils each. If you have no rings, you can use similarly sized and the material of the cylinder. Only need to overlap already 60-100 turns for each of coils. Important point: to wind the coils in opposite directions. At worst you can use a nail, but a large nail, and coils for single coil required already about 150. In addition, the efficiency of the nail is significantly lower than that of ferrite.
Perhaps now we will pass to practice.
Practice
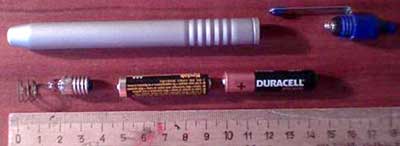
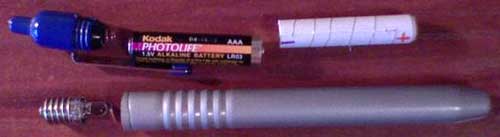
Consider the photograph of the flashlight. It is necessary to understand the meaning of my research. Nothing futuristic here, I note only that the switch is the button "pen", and a grey metal cylinder and conducts current.
So, first step. Create a "body" of the device.
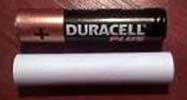
By size batteries do the cylinder. For example, the size of the batteries in my flashlight AAA. It can made from paper (like I do), or use a piece of rigid tubing. For gluing use a "rubber" glue, as it is a good dielectric.
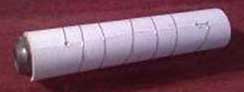
Make holes along the edges of the cylinder and wrapped it tinned conductor flowing into the openings of the ends of the wire. Fix both the end, but leave with one end of a piece of conductor: order connect the Converter to the spiral. (Nut shown in the figure until needed)
Now for the build of the Converter. I have not have a ring of ferrite (and Yes it would not fit in the lantern), so used the cylinder of similar material.
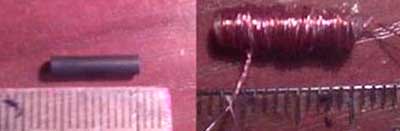
The cylinder was removed from the inductance coil from an old TV set. It neatly wrap the first coil. The coils are held together with glue. I climbed about 60 turns. Then the second, dangle in the opposite direction. I got it again 60 or so; certainly not believed - could not wind neatly. Attach with glue edges. We dry. In the process of drying the coil can be heated up slightly. I put it on a piece of paper on the ceiling table lamps. Let dry. And we go ahead.
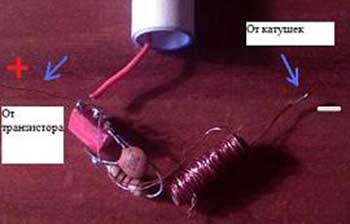
Collected under the scheme Converter:
Everything is as shown: transistor, capacitor resistor, etc. Passive and active elements assembled to fluster on the spiral the cylinder coil. The current in the windings of the coil have to go in different directions! That is if you shook all windings in one direction, then reverse the findings of one of them, otherwise the generation will not occur.
Rejoice, because we've got the following:
All of the insert inward, and the end covers and contacts use nuts.
One of the nuts fluster the terminals of the coil, and another the emitter of VT1. Glue. mark conclusions: where we will be the output from the coils put " - ", where the output from the transistor to the coil put "+" (that was the same as at the battery).
All. You got something similar to what is depicted on the previous figure.
Now you should make a "emptied". Take a regular cap from used light bulbs, and…
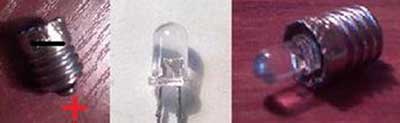
One point: the base should be minus of the led. Otherwise did not work.
There was another solution to the problem. Of course, you can create directly a Converter module with led in one body. In this case, as you've probably noticed, you have only two contacts. You can do so. However, in this embodiment, the solution cannot easily be changed LEDs. Why change? Very simple, because you can use UV LEDs, and check on the authenticity of banknotes and a lot more. In addition, I believe that my solution to the problem more ergonomic and interesting.
Equipment Assembly
As is clear from the figure, the transducer is a "substitute" second batteries. But unlike her, he has three points of contact: plus batteries, plus LEDs, and the General body (through the coil). However, its location in the battery compartment is certain: it needs contact plus led. Simply put, the Assembly sequence on the picture can't be changed. Otherwise, as you may have guessed, the device will not be to work.
Upgraded the light to work

This lamp is more economical, ergonomic and, because of the lack of a second battery is easy. And the main advantage of! All the details can be found in the garbage!
Author: radioxoma, Vitebsk; Publication: www.cxem.net