


")

Features schematic diagrams
Diagram of the detector shown in Fig. 2.43, and any has no peculiar features, simple and accessible to even novice repetition radio Amateurs.
How often in books and magazines, with proper installation and proper details work begins immediately.
The printed circuit Board
The printed circuit Board of the device shown in Fig. 2.43, b, it is made under SMD components, all parts are installed with the foil side, and drilling holes it is not required.
The manufacture of the search coil
The manufacture of the search coil requires high accuracy and thoroughness. The coil should be wound on a special frame, which is made of a Board with hammered it along the contour of the future of coil nails. After winding and bonding of turns of thread, the coils need to be laid in the plastic frame.
The frame for the coils (Fig. 2.43 in) can be made from two pieces of plexiglass 4 mm thick Of ABS plastic with a thickness of 1 mm is necessary to make the grooves for stacking of coils and glue to one of the bases. The transmitter coil of the metal detector must be wound wire sew 0.35 and contain 8+5+5 + 8 turns.
Receiving coil must be wound with wire sew 0.27 and contain 24+24 turns. There, inside the frame, must be installed and a Board on which are capacitors C11-C15. After wound coils are arranged in the frame, they need to be fixed in several points with glue gun. Then, the coil can be connected to the main Board of the device.
Setting of the metal detector
Capacitor C15 is necessary to set a minimum signal at the input of the receiving part. If that fails - then you should move the turns of the coils, and configure again.
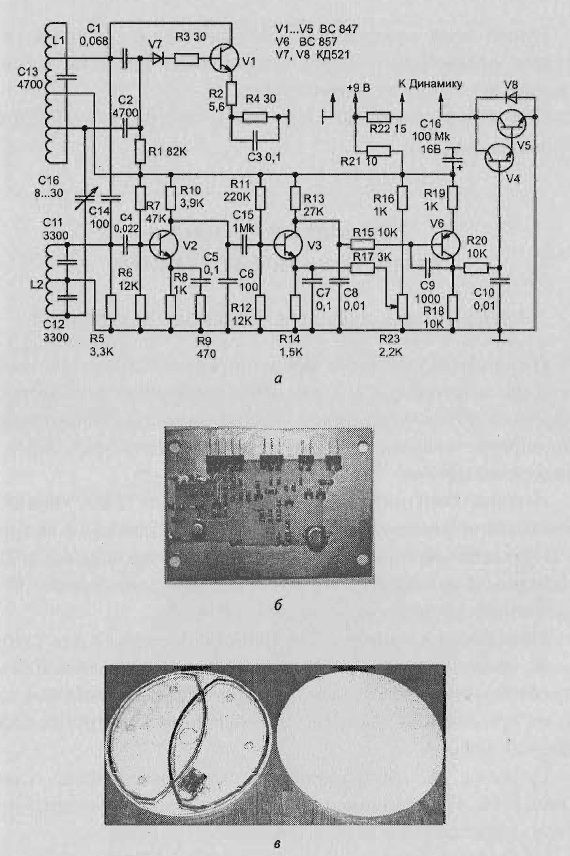
Fig. 2.43. Metal detector with combined coils: (a) schematic diagram; b - printed circuit Board; in - frame for the coils
After this procedure, the grooves of the armature coils must fill epoxy glue and close on top of the second piece of Plexiglas.
Publication: www.radiokot.ru