


")

Every time, going to work in the morning, we try not to forget to turn off in the apartment lights and appliances. Meanwhile, this function can be successfully performed the machine consists of three main blocks (Fig. 1): sensors, digital control device and key. Here's how it works.
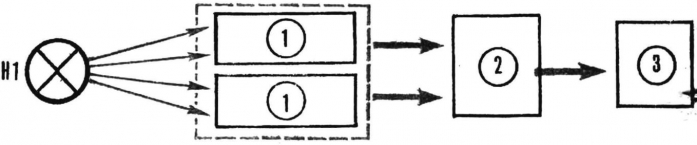
Fig. 1. Functional diagram of the automatic devices: 1 - sensors, 2 - the digital control unit, 3 - key
The light from the lamp H1 lights photodiodes B1 to B2 (Fig. 2), resulting in transistors V1 and V2 are opened and the inputs of the inverters D1.1, D1.2 goes low potential "0", which is then converted to high "1" output. Possible four combinations of States of the photodiodes at the intersection of luminous flux: 1) B1, B2 - opened, 2) B1 closed, B2 open 3) B1, B2 - closed, 4) V1 - open, B2 is closed. Thus, for each incoming apartment in the sequence combinations will be 1, 2, 3, 4, 1, and output- 1, 4, 3, 2, 1. Now it is necessary to "catch" these two sequences of combinations, to convert the sludge in single pulses and submit respectively to a summing or subtractive input down counter D6.
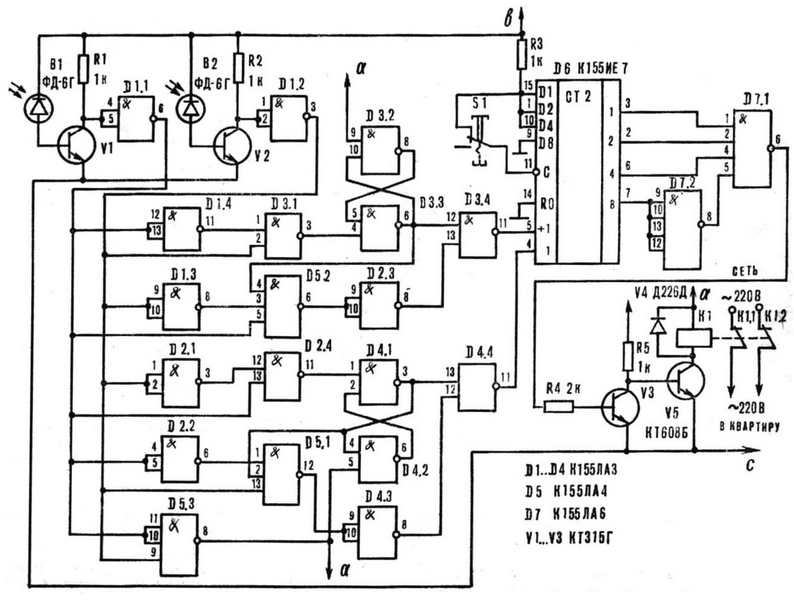
Fig. 2. Schematic diagram of the machine Leaving, turn off the light!"
This task is performed by a digital control device, based on logical the elements (chips D1-D7). It works as follows. For example, in entered the flat. A combination of 1, being the source is perceived logical element Z IS NOT (D5.3), the output of which there is a potential "0", setting outputs RS-triggered collected on the logical elements 2I-NOT (D3.2, D3.3, D4.1, D4.2) in the zero state.
The combination of the 2 is perceived logical element 2I-NOT (D3.1), the output which there is a zero potential, which sets the RS-flip-flop, assembled on the logical elements 2I-NOT (D3.2, D3.3), in the state "1". Combination 3 is skipped.
Combination 4 is perceived logical element 3I IS (or D5.2), resulting in at the counting input of "1" down counter D6 receives a potential of "0" which increases the contents of the counter by 1. But the combination of the 4 perceived and also the logical element 2I-NOT (D2.4), the output of which appears a "0", sets the RS-flip-flop (D4,1, D4.2) in "1"state.
Combination 1 newly perceived logical element 3I IS (or D5.3), zero potential output which returns the device to its original state.
Thus, the device is triggered only when the person is fully I entered the apartment. The contents of the down counter increases by D6 the unit entered the apartment one more person).
It is easy to see that when the person leaves the contents of the apartment reversing the counter decreases by 1.
If out of the apartment came the last man, the number 7 written in binary code (0111), will be perceived logical element 4I-NOT (D7.1), and the potential "0", coming to the input of the key, assembled on the transistor V3, will close it. In this case transistor switch V5 is opened, the relay K1 (MCU, PA4 passport.500.197 P) work, you will have the contacts K1.1, K1.2 will open, and the flow of electricity in the apartment will stop.
Transistors CTG can be replaced by any other series CT, KT315, CT, and CTB - CT, CT, CT with any letter index.
Instead MKU-you can apply WITH another relay type voltage 24 In, contact system which allows switching AC voltage of 220 V and power 2-5A.
Photodiode FD-6G permissible to replace FD-3.
The diagram of the power supply presents PA figure 3.
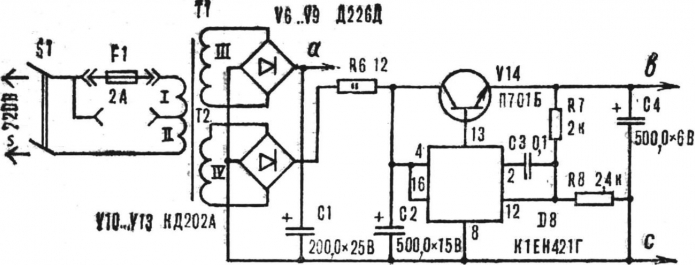
Fig. 3. Schematic diagram of power supply
The voltage regulator 5 V assembled on a chip D8 and transistor V14.
The transformer T1 is made on the yoke SH, Windings I and II contain respectively 1200 and 1600 turns of PEV-1 to 0.15, winding III - 360 turns Sew-1 0,2, IV - 120 turns of PEV-1 to 0.45.
Parts of the device (except the relay K1, the power supply and buttons S1) mounted on the circuit Board (Fig. 4) size 95X75 mm, made of double-sided foil fiberglass 1.5 mm thick. It is placed in any a suitable plastic or metal housing.
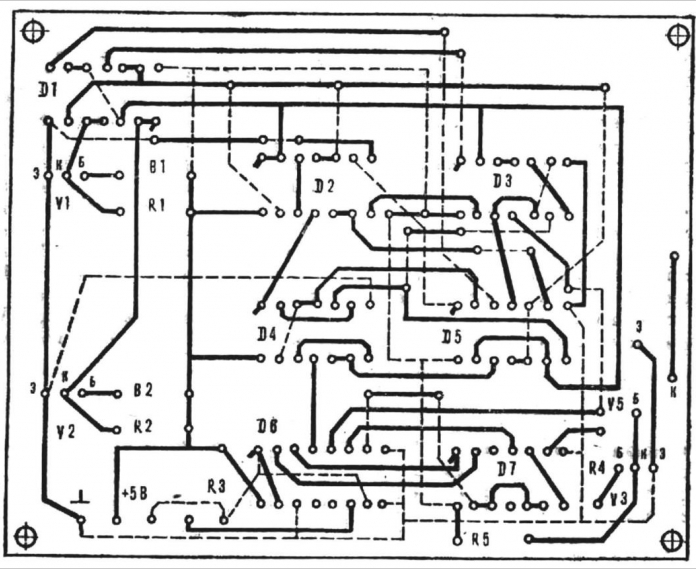
Fig. 4. Circuit Board digital control device arrangement parts (M1:1).
Adjust the unit as follows. Having checked up correctness of installation, disconnect the digital inputs of the control circuit from the outputs of inverters (D1.1, D1.2) and connect two keys collected on the chip 155 (Fig. 5). With their help simulates the intersection of the light flux. Then check the correctness of the passage signal.
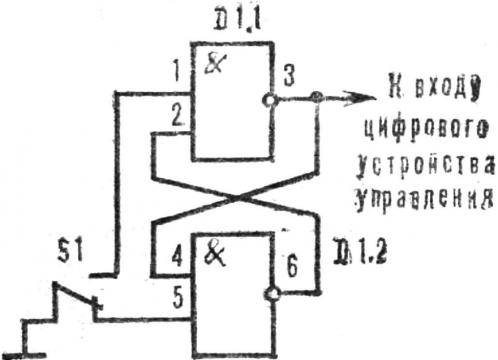
Fig. 5
The key on the chip K155LA3.Machine set inside the apartment near the front door so that the photodiodes were at a height of 65-70 cm from the floor. At the same level, but the opposite wall features a lamp of H1 with a reflector from a flashlight. A voltage of 5 V is supplied to it from the PSU.
The reliability of automatic devices depends on the stability and power the light flux incident on the photodiodes. Therefore, the lamp with the reflector and sensors must be securely mounted.
To increase the reliability by setting an additional collecting lens in front of the photodiodes (Fig. 6).
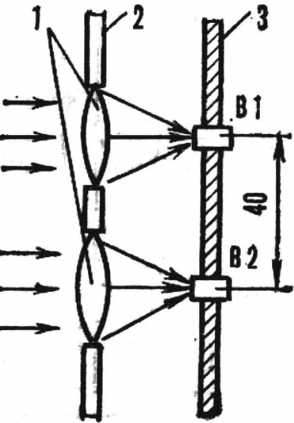
Fig. 6. Extra lenses: 1 - lens, 2 - cover, 3-circuit Board.