


")

After changing the radio at a decent (read: powerful) became acutely be a lack of mid bass and midrange is found. Standing in the front doors 10-cm Sony clearly were not designed to power the radio. This was the last straw that forced me to undertake the manufacture of podiums and install normal acoustics in the front doors. As she had chosen three-way "pancakes" Bazooka EL690 size 6x9". From three-component acoustic refused immediately due to the cost, and 'tweeters' were already in the a-pillars, it was a pity throw away. A detailed description of the manufacture of podiums under midbass in the doors described ch0zen-Ohm to http://ch.telemost.ru/podiums/podiums1.htm I will describe my own version.
Thus, the formation of the sound stage was assumed be performed using the following scheme: three-way speaker system with disabled the tweeter in the lower part of the front door and RF emitters arranged in racks the body directly from the front panel.
I really do not want to disfigure the inner metal wall of the door, so the location of the speaker and his orientation was chosen so that the magnet is turned on (or slightly came inside) regular hole for the speaker (remember, machine end of 1996 year place under door speaker is already there). For clarity of the scene I don't know why, considering that partial 'blur' is perfectly acceptable in the car. And yet, after Assembly of the entire system it turned out that I almost made a mistake with the corners :-)
What it took to work:
cardboard for making models (several boxes from under the motherboard),
10-mm plywood 1 sqm (50 rubles), 3 mm plywood, 0.7 sq m,
foam MicroFoam 500, or any other, MacroFlex, etc. (77 rubles),
fiberglass 0.25 mm 1 sqm (30 rubles), epoxy the resin is 1.5 l and the curing agent is 0.1 l,
solvent "650" 1 l,
putty "Tinysec" with fiberglass, 0.5 kg (75 rubles plus a rubber spatula, 15 rubles)
screws with countersunk head 14 PCs, screws with large semicircular head (fungus) 15 mm and 20 mm, 15 PCs.,
faux leather color door trim panel, 1 meters, 70 rubles.
carnations 10 mm in the amount of one matchbox, 5 RUB.
The only tools needed jigsaw, electric drill and slipery. Screwdrivers, knives, and other trifles do not take into account :-)
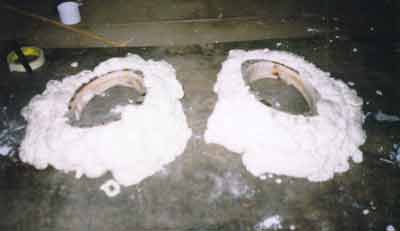
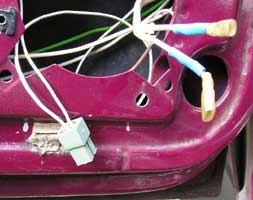
Technology of construction of podiums is not original: it is made power frame of 10 mm plywood in the form of the base, adjacent to the door trim, and oval, which will 'sit' of the speaker. To fit the base of the relief plating is used slices of 3-mm plywood (the place near the pocket). The oval is fixed on the basis of using 3 racks (the fourth is not needed, instead, is the base), which are fixed with screws with countersunk head. Be careful when choosing a place for racks! I screw that secures the rack, carefully came under mounting location for the speaker. Next sprayed on the frame mounting the foam is aged for about a day and handled knife and coarse-grained skin to impart a desired shape.
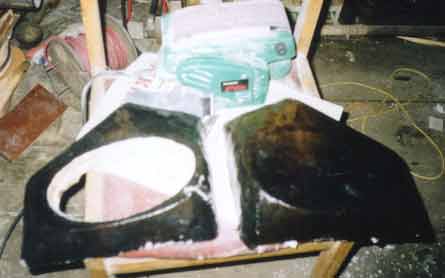
The next step should be the removal of the surface by pasting fiberglass. All holes and other errors neatly plastered with putty. After drying excesses and irregularities are handled by Liferay. I want to draw attention to adherence rates ratio hardener-putty, in excess of the first the cured mass is very hard to handle.
Then fiberglass. It is necessary to anneal at the stake or with a blowtorch before you start, so to avoid any hint of paraffin. The thickness of the fiberglass is not critical, more thin (0.25 mm or less) fits better, but mostly repeats the bumps and requires a greater number of layers for stiffness. Cook the mixture of epoxy resin and hardener (ratio 20:1) and diluted to the desired the consistency of the solvent, first soaked cloth, then applied a thin layer mix on podiums and laid fiberglass, carefully smoothed it down so as not have any bubbles, wrinkles, etc. cut the Excess with scissors. When thickness 0.25 mm I put 2 layers. All work is carried out with bare hands, so in the residues of epoxy hands were even a week after finishing work :-) launder hands and tare from the mixture of solvents have been used.
By the end of the day all dried up, a knife with a serrated edge cut out a hole for the speaker and checked as the catwalk falls on the door trim. All appeared inaccuracies eliminated Liferay.
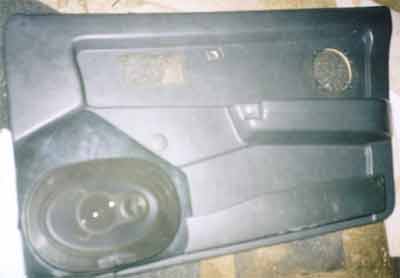
Then had to wrap the catwalks of artificial leather. Shoemaking craft, as, however, all previously described, mastered for the first time, so without it! has not done. The skin should be pulled so that the corners are not appeared folds. One great fold into many smaller ones that gently stretch out on the inner part of the "blanks" where and fixed carnations. Frankly, completely without folds to fit failed, their made in the lower part, hidden from view. The skin on the oval dynamics, glued a "Moment", so when you cut oval she left. For reliability and brought another 4 carnations, although this is unnecessary.
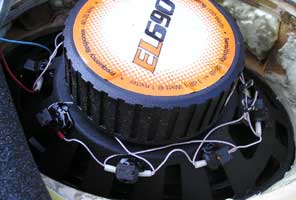
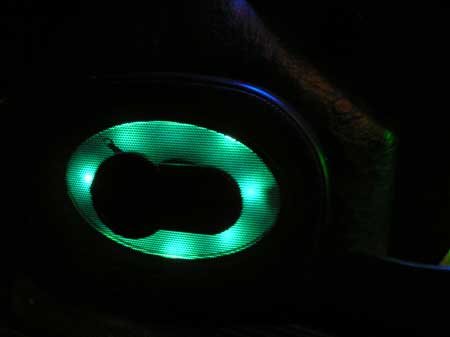
Internal illumination speakers performed as follows: using a hot-melt adhesive around the perimeter of the back side dynamics consolidated 8 bulbs in cartridges seized from the old dash, connected them in parallel and brought a separate connector for connection.
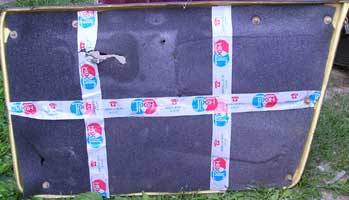
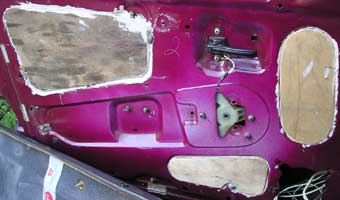
We have reached the soundproofing. A 3-mm plywood carved elements, repeating the holes in the door, glued on the sealant. On back of shingle laid out a sheet of foam 8 mm, securing it staffing clips-"Christmas trees".
All I have took about three weeks, however, everything was done in someone's garage and work on the day had 2-2.5 hours. The result is in the photo.
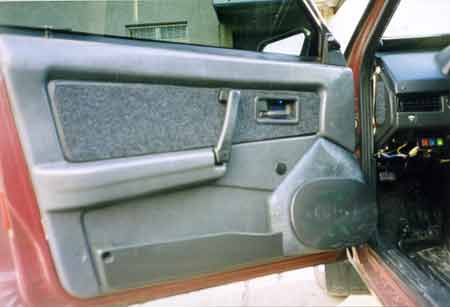
At night this creation looks quite nice:
Another is strong vibrations all four doors at a decent volume, creating on the street very loud metal on breakage. But not inside it is audible. Soundproofing doors would not hurt…
Publication: www.cxem.net